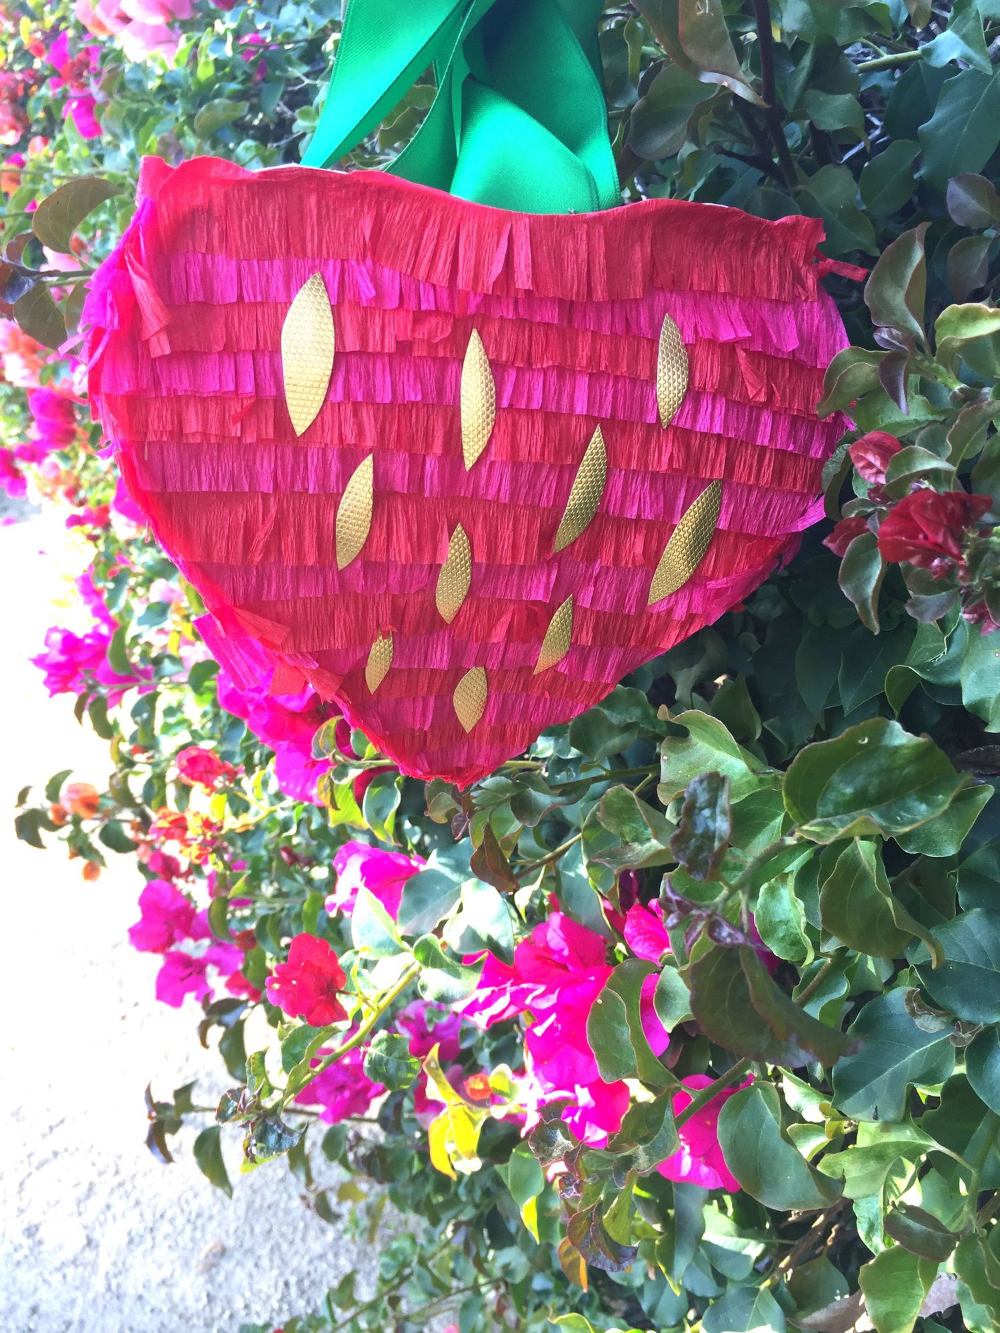
STRAWBERRY PINATA BASKET DIY
/


I mean, really, when you think about it, who doesn't need a strawberry piñata basket in their lives? It's perfect for a trip to the farmers' market, picking strawberries from the field or just accessorizing your Valentine outfit. So here's the DIY!


You'll need: heart template (we used a heart instead of a strawberry template for a less literal look), three sheets of cover weight paper, scissors, fringe scissors (or you can cut the fringe with regular scissors), glue, green satin ribbon, shiny gold paper (or gold glitter paper), red and hot pink crepe paper.
To start, print heart template and cut it out.
Trace heart on each of your three pieces of card stock and cut them out.
Place heart bottoms together, laying flat and tape.


Bring the first heart over to the third heart so you form a 3D heart/cone shape and then tape those edges.
Continue to tape each of the three seams up to the top of what is now the base of your heart basket.

Cut three lengths of green ribbon, appx. 12 inches each.
Tape one end of the first ribbon to one inner heart center.
Tape the other end of the first ribbon to the second heart center.
Repeat with second and third ribbons.


Cut a length of crepe paper.
Stretch it out by laying it on the table, placing your hands on each end and pulling.
Fold it in half lengthwise.
Cut fringe for the length of the crepe paper, leaving about 1/3 uncut at the top.

Draw a line of glue at the bottom of the heart.
Cut fringe to appropriate width.
Glue fringe.
Repeat all the way up to the top of the heart, alternating between red and hot pink.
Repeat on side two and three.
Let dry.

Cut appx. 30 free-hand "seeds" from your gold paper. Glue about 10 onto each of the three sides.