CELEBRATING EASTER WITH SEEDLING POM POM BUNNIES

We're really feeling the Easter spirit around here! So it was perfect to get a craft from Seedling, that we could do with the kids, to get the celebration started. 

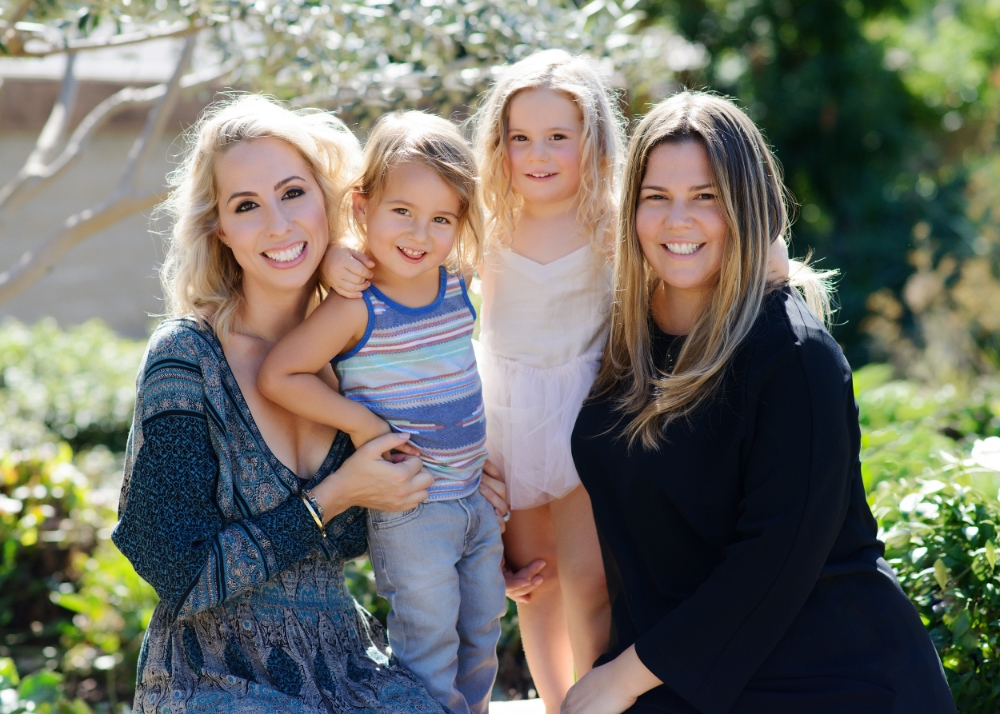
These Pom Pom Bunny Kits are for 5+ so we gave Brixton (3) and Mila (4) some help. They loved wrapping the yarn around the pom-pom template, and of course, decorating the bunnies -- those little faces! Here they are in action. 

Attention to detail. 

Happy Easter!

BEATING THE WINTER BLUES WITH SEEDLING

We found the cure for the winter blues -- making your own superhero cape! Our kids (Brixton, 3 and Mila, 4) fell in love with these Seedling cape kits. 

The kit came with everything our little designers needed: cape, glitter glue, foam stars and felt shapes. We just let these cute cousins go wild, doing they're own painting and gluing.

Post-decorating, they were ready to take flight! 

The world already feels like a better place with these two superheroes looking out for us. 

Happy January! XOXO

ST. PATRICK'S DAY RAINBOW FEATHER CROWN DIY

I loved this St. Patrick's Day rainbow feather crown from last year so much I thought I'd share it with you again!

Obsessed with feather crowns over here! So why not make one for St. Patrick's Day? This DIY is pretty fast and easy but still packs a colorful punch. 

Here's what you'll need: colored feathers, gold headband, gems, hot glue gun, scissors. To start, choose your feathers in a rainbow of your liking:

Trim the stems so that all the feathers are close to the same length:

Turn the headband inside out and glue the feathers with a hot glue gun to the inner middle of the band:

Choose your gems:

Turn headband right side out. Place gems below the headband to make sure you like the configuration first. Then glue them on band with hot glue gun:

And you're done! Now you can go chasing leprechauns and pots of gold.

STRAWBERRY PINATA BASKET DIY

I mean, really, when you think about it, who doesn't need a strawberry piΓ±ata basket in their lives? It's perfect for a trip to the farmers' market, picking strawberries from the field or just accessorizing your Valentine outfit. So here's the DIY!

You'll need: heart template (we used a heart instead of a strawberry template for a less literal look), three sheets of cover weight paper, scissors, fringe scissors (or you can cut the fringe with regular scissors), glue, green satin ribbon, shiny gold paper (or gold glitter paper), red and hot pink crepe paper. 

To start, print heart template and cut it out.

Trace heart on each of your three pieces of card stock and cut them out. 

Place heart bottoms together, laying flat and tape.

Bring the first heart over to the third heart so you form a 3D heart/cone shape and then tape those edges.

Continue to tape each of the three seams up to the top of what is now the base of your heart basket.

Cut three lengths of green ribbon, appx. 12 inches each.

Tape one end of the first ribbon to one inner heart center.

Tape the other end of the first ribbon to the second heart center.

Repeat with second and third ribbons.

Cut a length of crepe paper.

Stretch it out by laying it on the table, placing your hands on each end and pulling.

Fold it in half lengthwise.

Cut fringe for the length of the crepe paper, leaving about 1/3 uncut at the top.

Draw a line of glue at the bottom of the heart.

Cut fringe to appropriate width.

Glue fringe.

Repeat all the way up to the top of the heart, alternating between red and hot pink.

Repeat on side two and three.

Let dry.

Cut appx. 30 free-hand "seeds" from your gold paper. Glue about 10 onto each of the three sides.